

Marble Shelves DIY

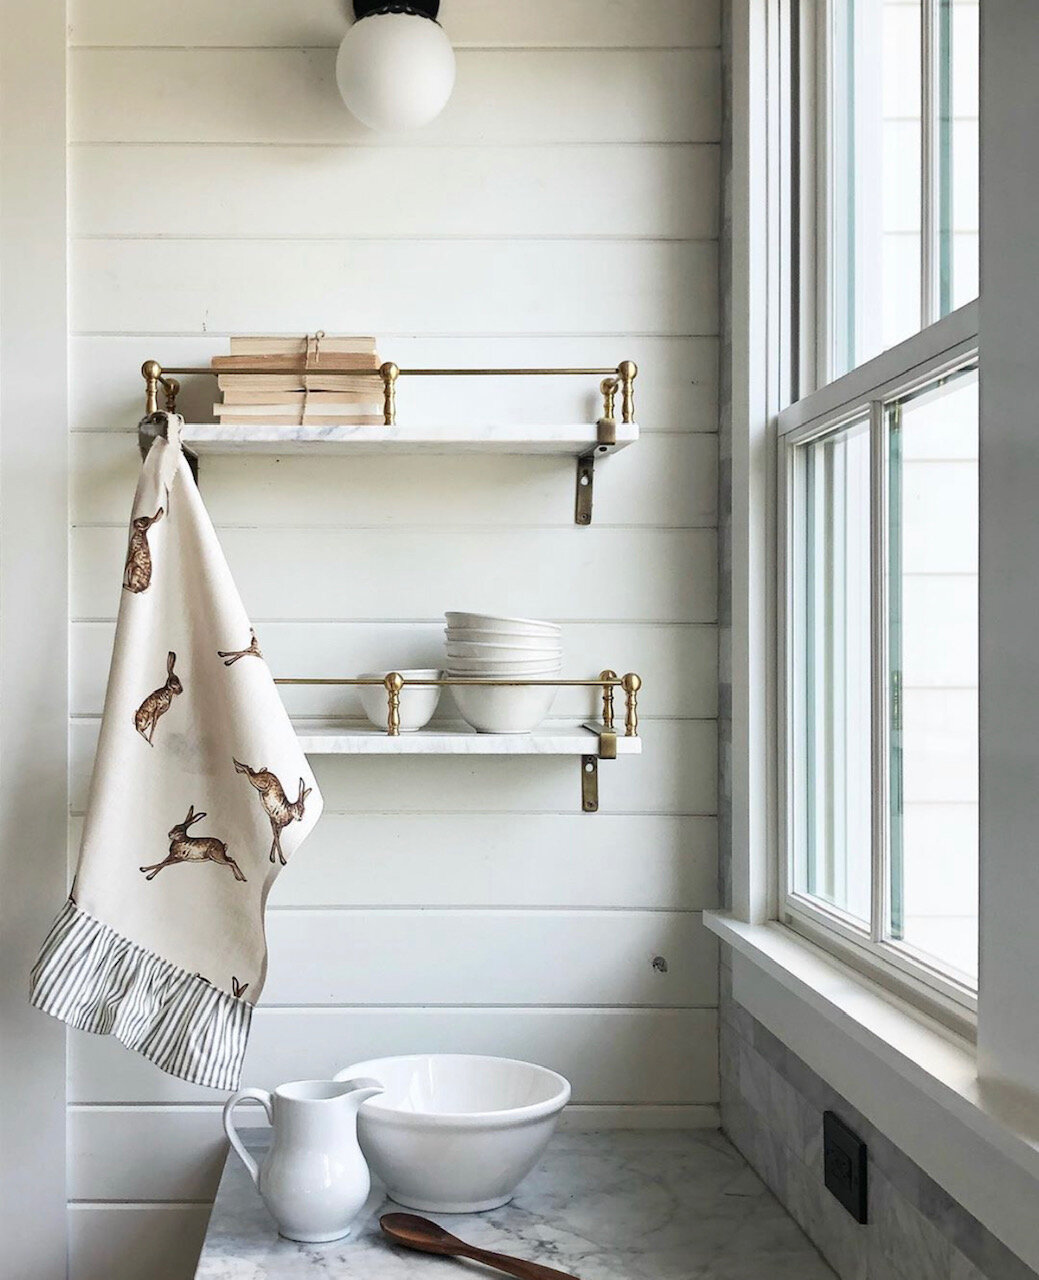
As we all know by now, Pinterest is dangerous. Long before the hole was even dug for our house, I came across an image of a bakery in France with the most amazing marble shelving. Wall-to-wall, stacked with glassware, linens and twine, it had beautiful brass railing systems to hold everything safely in place high above the work surfaces below. It also looked extremely old with the kind of character that often stops me in my tracks. The hunt began, my heart was invested, I simply had to have them. But as often it goes with ‘Pinterest dreams’, in reality there was nothing to be found within reach. DIY was the only option.
The marble was pretty easy to find. We originally considered having the remnants from our kitchen counters cut and finished to size, but besides being rather pricey they would have been nearly 2” thick. We were somewhat worried the weight would be an issue for suspended wall shelving. The internet turned up several options, and we found the ‘Mix & Match Marble Wall Shelves’ from World Market were not only the perfect size, but also an excellent value. They did not disappoint. They are available in 24” & 36” lengths, and at 8” deep with under an 1” in thickness, their weight is more manageable for a project like this.

Lucky for us, World Market also has the wall brackets for their mix & match shelving systems. And even luckier, they have several brass options. We chose the option they refer to as ‘antique brass’, partly for the finish but mainly for the style. They are fairly basic with a minimal side profile. Since we knew we would be adding lots of detail with the railings, we wanted as simple a wall bracket as we could find to not compete.
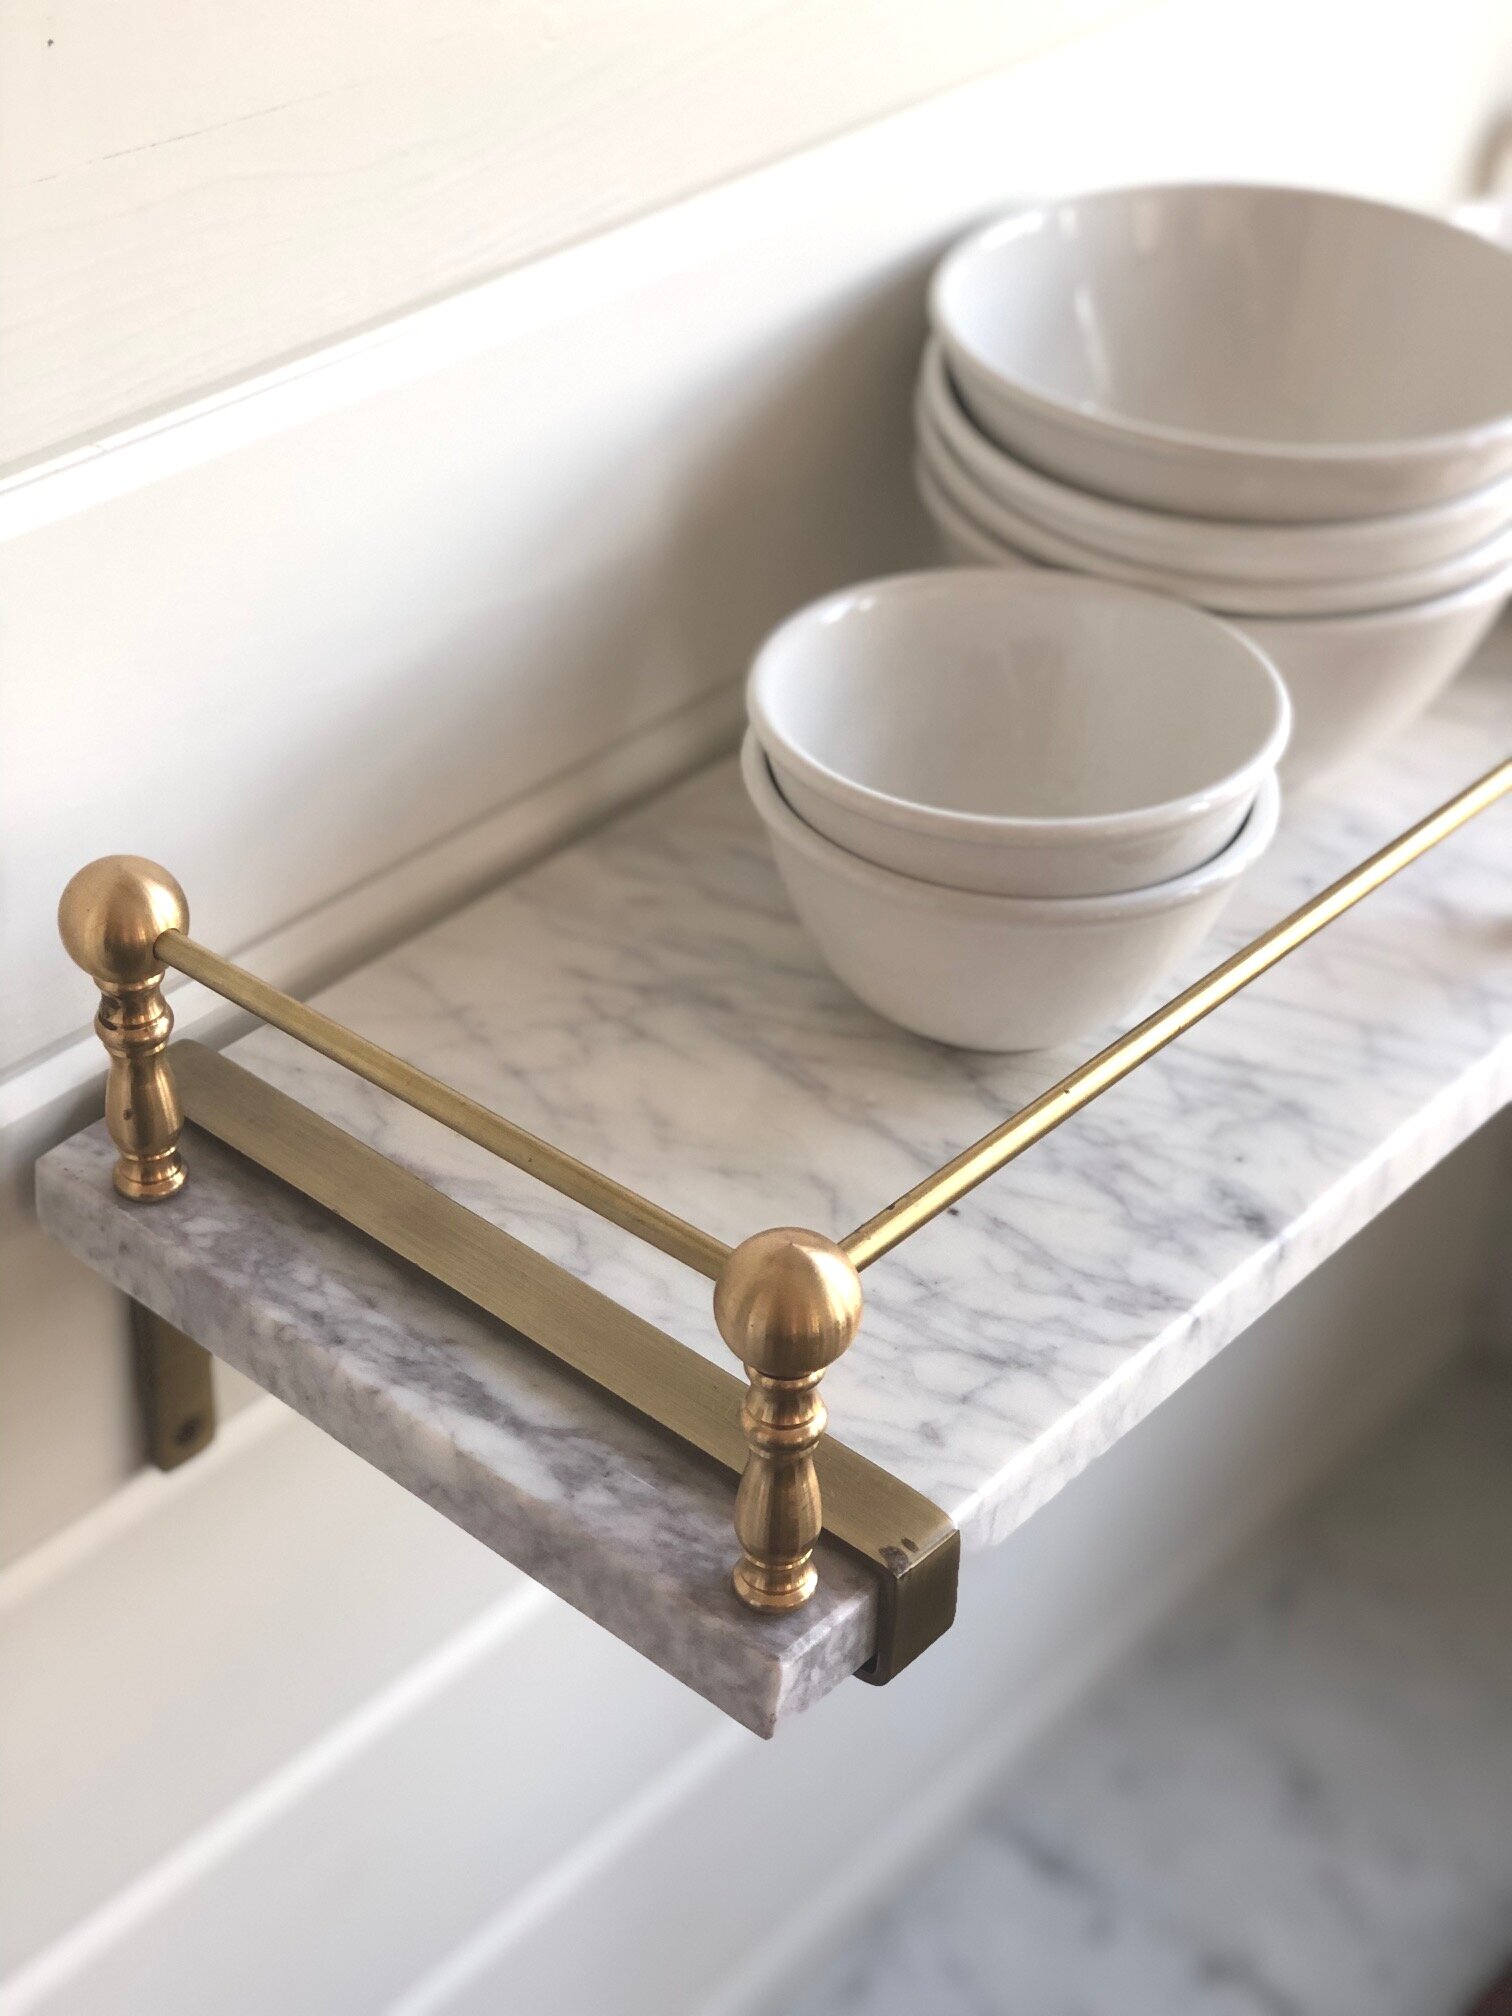
That left the brass railings themselves. They were a bit harder to find than the shelves and brackets. After some late night coffee & research & hair pulling, we finally learned the technical name for this style of furniture and fixtures with the rails is ‘gallery railing’. Once we had our lingo right, the internet delivered. We chose a system through Paxton Hardware, which required purchasing lengths of the rails along with the posts that support the railings.
Now for the math. This makes my head hurt but thankfully my husband is a genius. We chose 24” shelves, and we knew we wanted to include railing that spanned the front and sides of each shelf. We also knew we had to account for space to include the posts, as well as a little relief space so the rails did not run to the very edge of the shelving. To complicate matters a little, the shelves from World Market are pre-drilled to accept the wall brackets from their own system. We had to consider the fixed placement of the wall brackets on the shelves themselves so our gallery railing wouldn’t interfere.
The railing from Paxton comes in a 36” length and can be cut to size {extremely carefully}. We purchased one 36” rail for each shelf. We trimmed them down into one 22” and two 7” pieces. That gave us our front and side rails. We measured carefully, as we would need every inch of the railing. We taped off the site of each cut with painters tape to help prevent scratching and carefully sawed through the rails with a hacksaw to get our pieces. We lightly sanded the cut edges of the rails for safer handling.
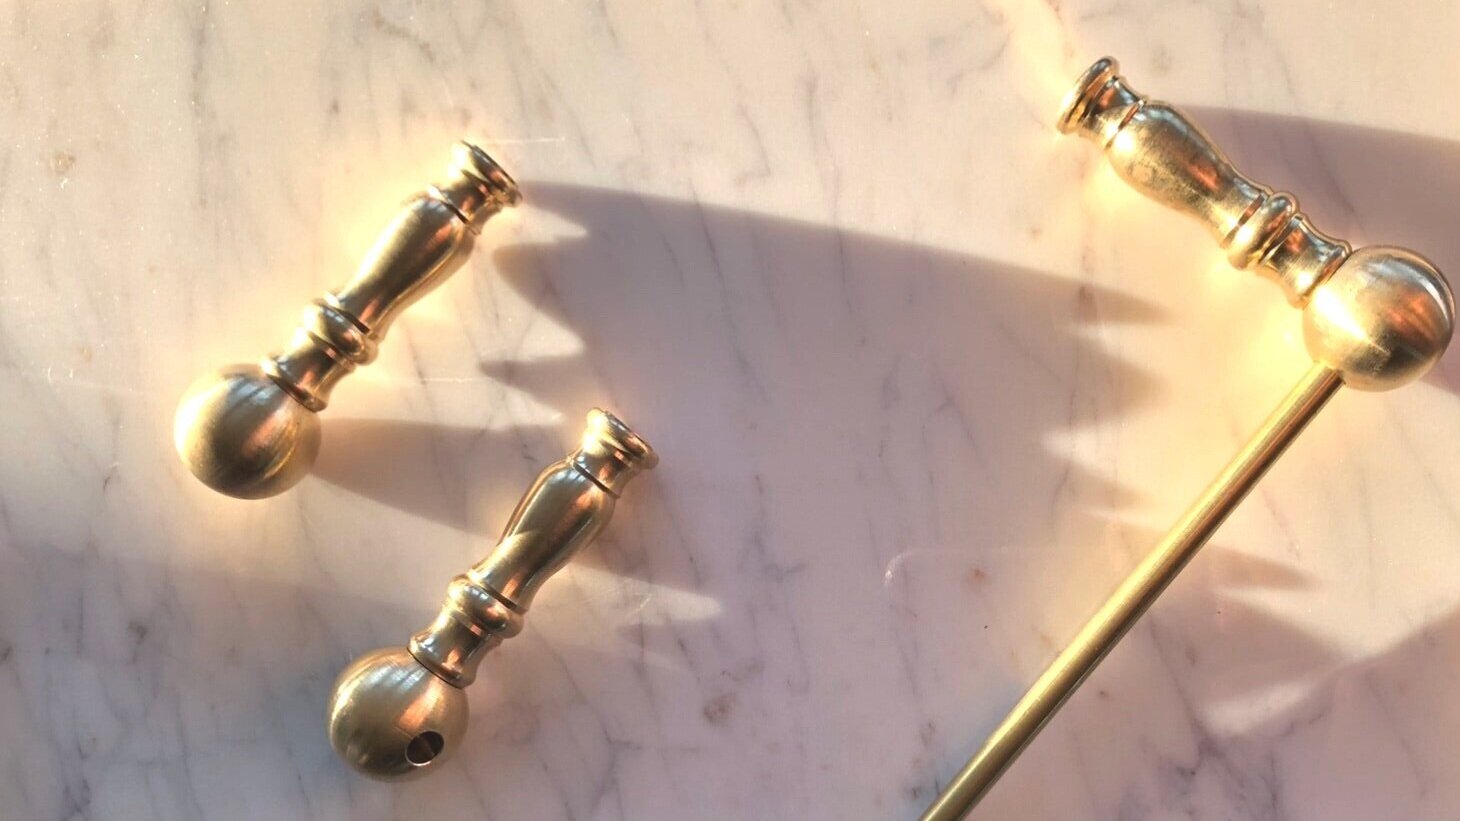
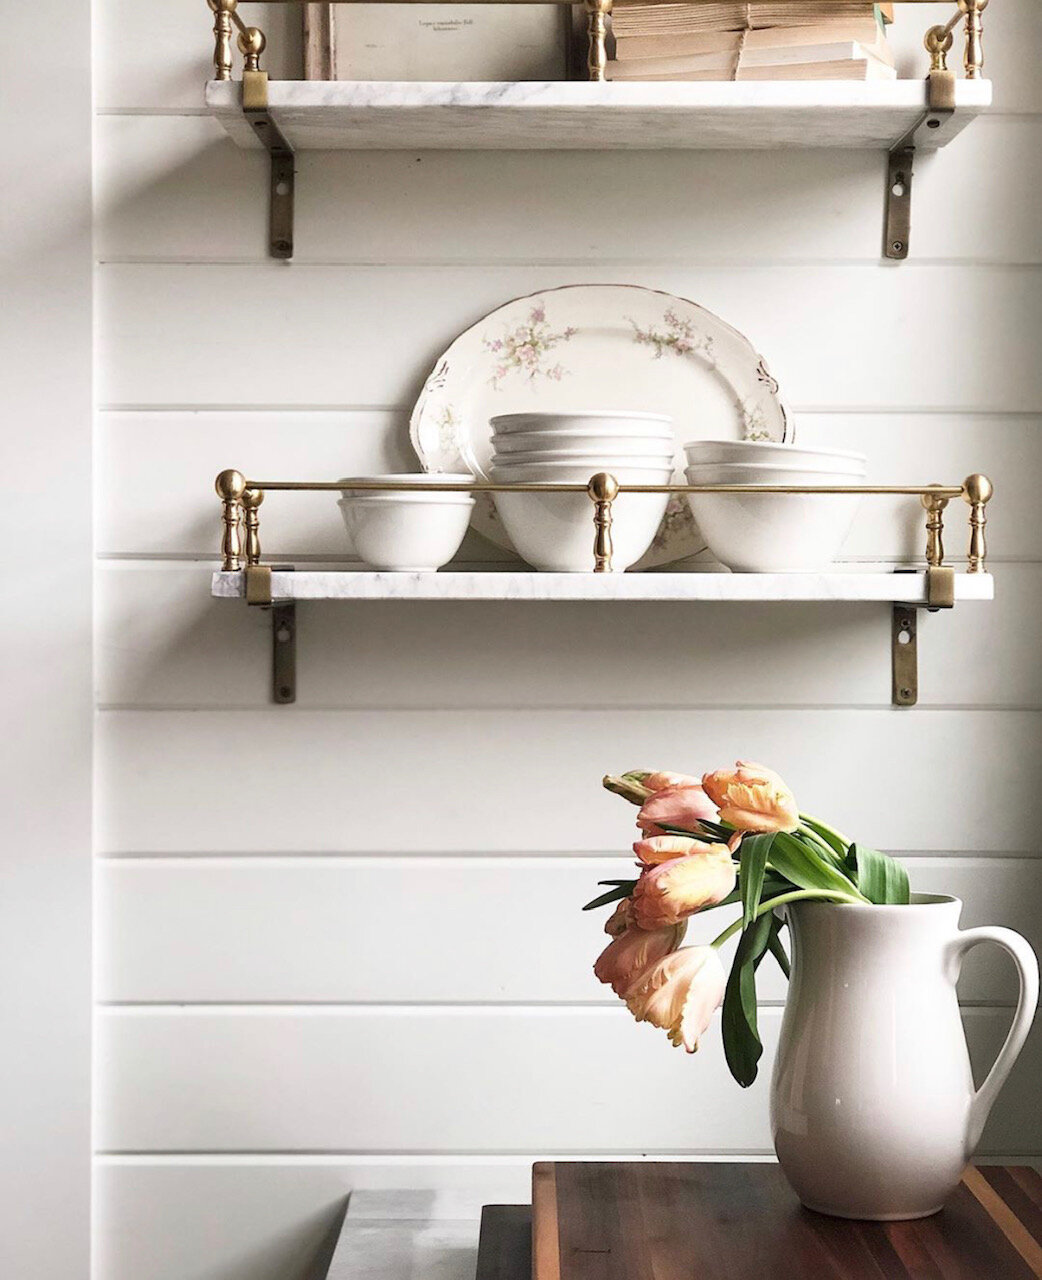
Onto the brass posts. Paxton offers the posts individually in several configurations to allow customization for projects. There are posts that include one hole to accept the rails (end posts), posts with a hole drilled straight through the center to let a rail pass through (support posts) and posts with two holes drilled to accept two rails at a 90 degree angle (corner posts). We knew we needed two end posts for each back corner of the shelves and two corner posts for each front corner of the shelves. We decided to add one support post to the front of each shelf to help hold the longest run of railing… but also because it is PRETTY.
The posts come pre-drilled in the bottom to accept screws to hold them in place. Presumably, if you are placing them on wood shelving, they could be affixed pretty easily in place by drilling through the shelf and securing them with screws from underneath. But our shelves are marble. We had two concerns about drilling them to affix the posts as they are intended to be. One, we had great concerns about cracking the marble. Five holes per shelf is a lot of drilling. Second, we would get one shot at placement. So if our measurements were even a hair off, our posts and rails may not fit properly. My husband may be a genius but he is also extremely risk-adverse. Excluding that time he jumped out of a plane. And every roller coaster he has dragged me onto. ‘Extremely’ may be a stretch but he is actually very careful.
E6000 to the rescue. We decided we would use a hearty epoxy which would provide decent hold for the posts, allow us the ‘play’ we needed to get the placement correct, and save us from having to drill the marble. Is it ideal…no. But we planned for these shelves to hold things that wouldn’t get grabbed for often, like smaller bowls and artwork, limiting the contact we would have with the rails. Understanding and accepting that if we bump them hard enough, the rails will likely detach from the shelves.
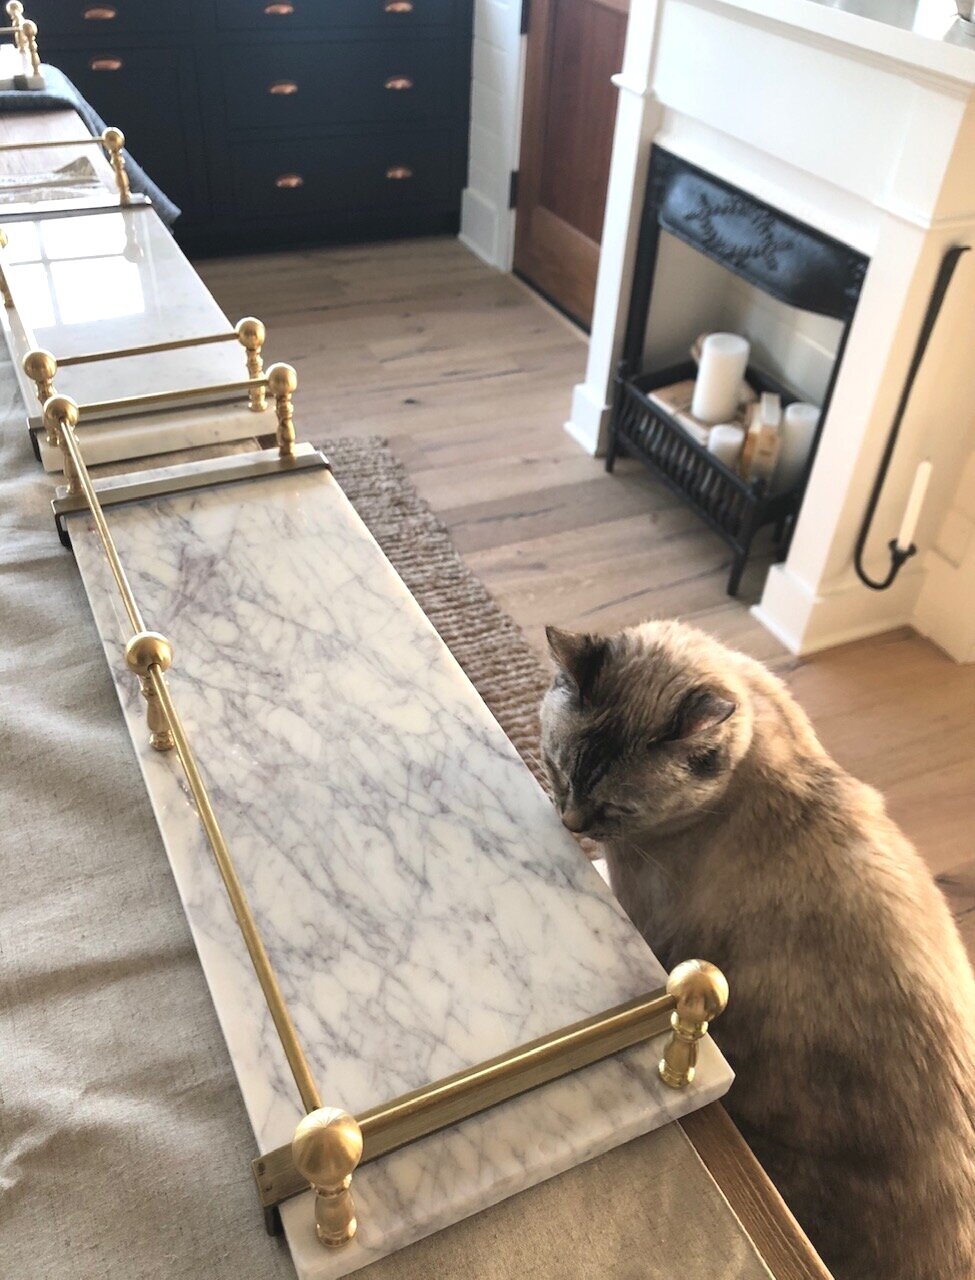
From there, it was simply a matter of laying everything out, gluing, and waiting. If you try this out and decide to use the same wall brackets we did, you will want to remember to attach those to the shelves before gluing on your railings. With this style, they can’t be added afterwards. Another important consideration is hanging. Between the marble and all the brass these shelves on their own are HEAVY before you even account for whatever you plan to put on them. You will want to get professional help to hang them if you have any doubt about where your wall studs are or even if they can be properly supported by your wall structure at all. We had the good fortune of seeing the wall where we planned the shelves to live in stud form, and were able to reinforce and mark them carefully for install. Between the reinforced studs and the 3/4” thick cottage style tongue & groove paneling we have in place of drywall {NOT shiplap, please don’t call her shiplap}, we got the green light to hang them.
What I could not have anticipated was how much interest these DIY shelves have garnered. I’ve heard that some of the items we used to make our shelves are sold out or have fluctuating availability. We gathered supplies for the shelves back in 2018, so naturally as time marches forward both World Market and Paxton Hardware may experience changes in their offerings. There are truly a lot of alternative options out there to achieve a similar look. If you try this at home, let me know. I’d love to see it!
All images copyright 2015-2023 The Linen Rabbit. All rights reserved.